Tuesday, December 20, 2011

Bench beautification

I bought this ugly (read: UGLY) bench off Craigslist one day, about a year ago, for some reason. I'm not really sure why... but at the time I had an idea. Anyway, it cost a whopping $9 and it's been in my garage ever since.

Fast forward to my son's birthday. I just got a new table, inherited from my Grandpa (thanks!) and it seats 6, but I only have 4 chairs.... and the dilemma is I have a bunch of kids coming for pizza and cake. So, I drag out the 'ol bench and it is disgusting. I mean, nasty. It's a lot dirtier than I remembered. I quickly dig through the linen closet and find a bed skirt to throw over it and tie it up in the back with a hair tie and shove it against the wall. It's a quick fix that didn't look half bad.

The next day I snuck away from the kids and the dude and went to Goodwill, on a mission! I found a perfectly pleated chocolate brown bed skirt and a nice piece of fabric that is both water resistant and a good color (plus, it's reversible!) so I bought them and headed home to dig my staple gun out of the closet. I cut the white part off the bed skirt (the part that lays on the mattress) and just used the skirt. Then, I stapled the fabric from the underside on the front of the bench, so you wouldn't notice the staples. Since the bench sits against the wall, I wasn't too worried about the backside. You can't see them anyway unless you are laying on the floor.. so baby Henry is really the only one with a crummy view :)

Here is the process of beautifying the bench, in pictures:

Ugly $9 bench

King size bed skirt from Goodwill.

Two toned fabric. I used the sage green side.

I cut the white part off and stapled the skirt. It was a bad cut job, but it didn't matter because the fabric would cover it all anyway.

Skirted.

I flipped the fabric over on the front of the bench and stapled from the inside.

When I pull it over, you can't see the staples. This is the side everyone will see.

Finished! It looks better in person. The lighting in my house sucks and made it look a little lumpy.

Here it is, under the window. Perfect fit :)

Labels: ,

Wednesday, December 7, 2011

Picture Frame to Light Switch Cover

I bought this adorable little frame at a local thrift shop for 50 cents! What a steal! I used scrapbook paper to embellish it. It took all of 5 minutes to turn it into a sweet little light switch cover.

Monday, June 13, 2011

Pimp My Tray

I bought 3 of these ugly trays for the older kiddos. They like to eat snacks in front of the tv on movie nights and it drives me nuts when they dribble food on the throw rug! So, I found 2 of the trays at a garage sale for $.75 each & 1 at the Goodwill for $1.99. I  had some plastic spray paint leftover from my Little Blue Dune Buggy re-do (pics to come later) and used Mod Podge & scrapbook paper to seal the deal. Here is one of the completed trays.
Before


After

Little Rad Bag Re-do

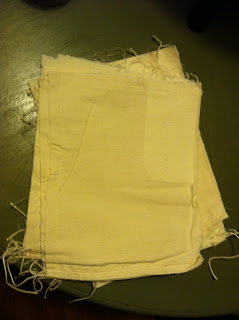
A while back I was at the local Goodwill with my coworker and found these odd little canvas bags. They were labeled as mail bags (still need to Google this to see if I can find more) and they were 4 for $1 so I bought 16, hoping I could find something cool to do with them. Now, I wish I would have purchased more! I bought a couple of sweet stencil books off Amazon over the holidays and have been itching to use them more. Turns out, these bags are perfect for the stencils! The bags came inside out, so I taped a stencil on and used spray paint. The paint bleeds through, creating a cool "weathered" effect once you turn them right side out. They have a string that cinches them closed so I figure I'll use them for gift bags or whatnot.
Before: Odd little canvas bags from the GW

During: stencil & spray paint

After: This bag is for my cousin's wedding gift
Another after. Sorry, I forgot the before & during, but I can imagine you get the point.

Hutch Updater

Before: $20 dresser I bought at the ARC Thrift Store

After: Transformed into a hutch!

Monday, February 28, 2011

Fun little weekend project: Wicker basket end table

I found this cute little end table on craigslist for free over the weekend. So cute! Just what I needed for my living room to keep all the kiddo's toys hidden. I paid about $2.50 for a small sampler can of paint and my splurge was the Martha Stewart drawer pulls which were $4.50 each. The fabric was leftover from my Fancy Frames redo.

Before

After

Bunkbed finished!

Okay, so it's not the best picture. Aiden's room is really dark (the gloomy Oregon weather isn't helping any either). So, this was the best I could do. Once I get his room cleaned up and his beds made, I will post a prettier pic :)